Today’s Post by Joe Farace
Cindy Crawford once said, “even I don’t look like Cindy Crawford when I get up in the morning!”
 Out here in the real world, few of us are perfect. That’s why one of the challenges aspiring portrait and glamour photographers have to cope with is retouching.
Before you begin doing any retouching on any portrait there are a few steps you can take to make sure that your images won’t need too much retouching: Start by working with a good make-up artist. While the process may be slow, it will make your portrait client happy and can improve your photographs better than you might imagine, To minimize retouching you can slightly overexpose the portrait making it just a little brighter than your camera or flash meter says is correct. Both of these techniques should minimize or maybe even eliminate any major retouching.
OK, so nobody’s perfect but we all want our portraits to look like how we think we should look, at least on our best days. A recent Google search of “Portrait Retouching” yielded 12,400,000 hits, all of which claim to have the secret to the best retouching methodology. Here’s number 12,400,001 and one of my favorite retouching techniques.
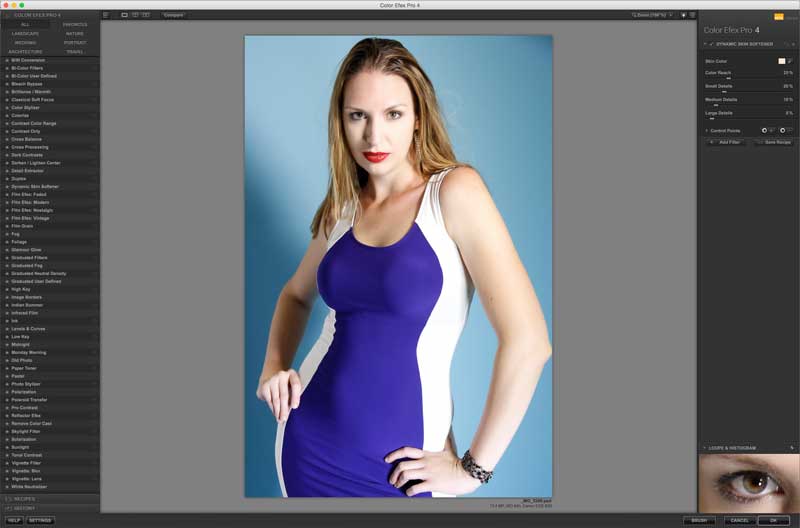
 I’ve found that one of the easiest ways to retouch a portrait is to use a Photoshop-compatible plug-in such as the Dynamic Skin Softener filter that’s part of Color Efex.
Using the software’s built-in color picker, you can select a specific skin color within a portrait so the softening effect is only applied to those exact skin areas while preserving details in the subject’s hair.
The dialog box’s Color Reach slider lets you expand the range of colors affected by the filter beyond the initial color selected by the skin color picker. The higher the value of this slider, the more that colors similar to the selected color are affected. A Soften Strength slider controls the amount of overall softening that’s applied to the colors set by your other choices.
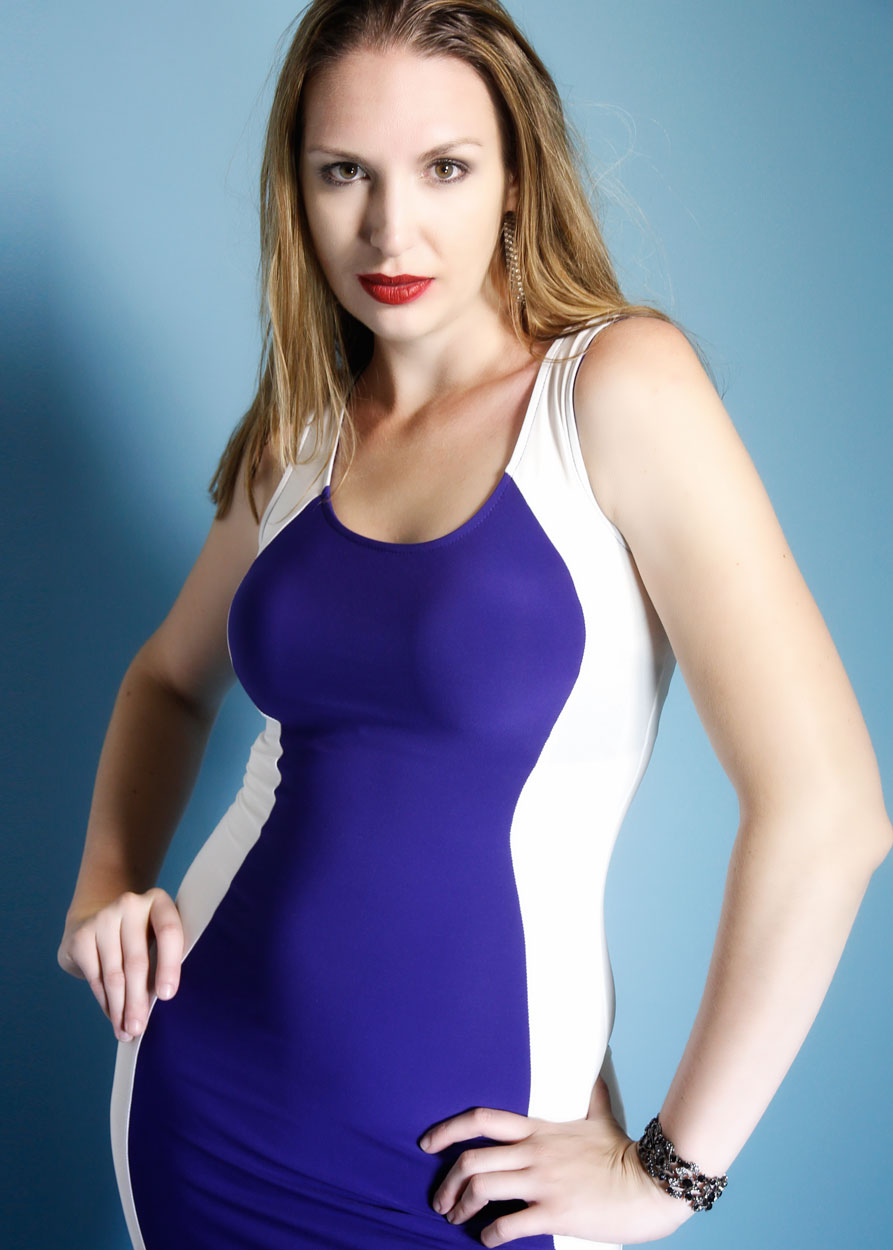
I usually apply any retouching filter to a separate layer and then magnify the portrait while adjusting the layer’s opacity until I achieve a realistic but retouched skin tone, one that has some texture without looking plasticy. To kick it up a notch, I sometime—almost always— apply the Glamour Glow filter, as I did in the portrait at left, to a separate layer and lower its opacity to taste.
How I made this portrait: For this portrait of Danielle Nicole, I placed two LED panels at camera left at different heights—one high and one low—to fully light her dress. A 42 x72-inch Westcott Scrim Jim with white fabric was placed at camera left for fill. I used a Canon EOS 60D with EF-S15-85mm f/3.5-5.6 IS USM lens (at 50mm) with an exposure of 1/80 sec at f/5.8 and ISO 640. Background was a 53-inch roll of Savage’s Ocean Blue seamless paper.
For more on this subject, see my post Retouching and Makeup for Glamour Portraits featuring a before and after portrait of my former muse, Tia Stoneman.
 If you enjoyed today’s blog post and would like to buy Joe a cup of Earl Grey tea ($3.50), click here. And if you do, thank so very much.
My book Joe Farace’s Glamour Photography is full of tips, tools and techniques for glamour and boudoir photography and includes information on all of the cameras used as well as the complete exposure data for each image. New copies are available from Amazon for $32.26 with used copies starting around nine bucks, as I write this, which is a bargain no matter how you look at it. The Kindle version is $19.99 for those preferring a digital format.